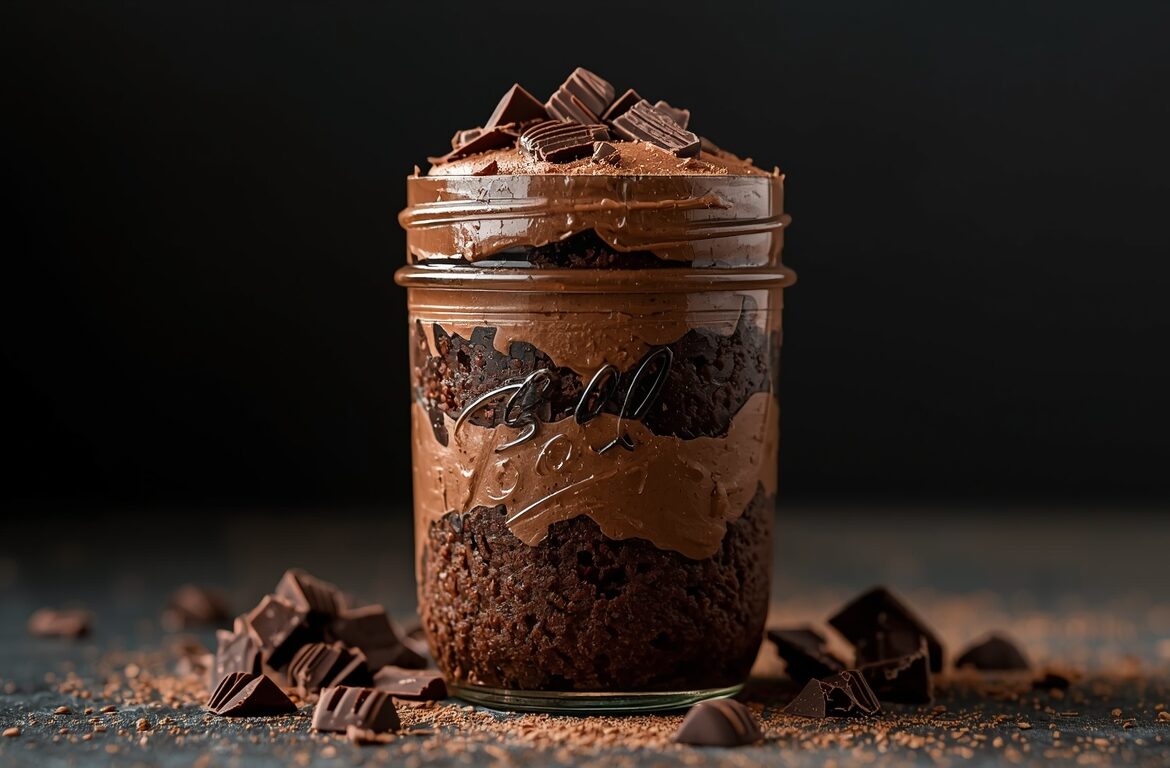
The Cake in a Jar Recipe has transitioned from a niche baking trend to a sophisticated method for portion control, gifting, and long-term dessert storage. Unlike traditional sheet cakes or round cakes, baking directly in glass jars offers a unique thermal environment that influences the crumb structure and moisture retention of the sponge. This method requires a precise understanding of heat distribution within cylindrical glass vessels and a strict adherence to food safety protocols.

For the professional baker or the serious home cook, the Cake in a Jar Recipe represents an exercise in precision. The primary objective is to produce a cake that is perfectly leveled, aesthetically pleasing through the glass, and safe for consumption. This article provides a technically rigorous framework for executing this recipe, ensuring that every jar produced meets high standards of consistency and safety.
The Science Behind Cake in a Jar Recipe
Baking in glass is fundamentally different from baking in metal. Metal pans are excellent conductors of heat, rising in temperature quickly to create a crust. Glass, however, is an insulator. It takes longer to heat up but retains that heat for a significantly longer duration.
Thermal Dynamics and the Crumb
In a Cake in a Jar Recipe, the batter in the center of the jar takes longer to reach the target temperature than batter in a metal pan of the same volume. This slower heat ramp-up can lead to a more even rise, but it also increases the risk of the exterior overbaking before the center is set. To compensate, the oven temperature is often lowered slightly while the baking time is extended.
Moisture Sealing and Vacuum Creation
The most technical aspect of the Cake in a Jar Recipe is the sealing process. If the jars are capped immediately upon removal from the oven, the heat from the cake sterilizes the underside of the lid, and as the air inside cools, it contracts. This creates a vacuum seal. However, this must be balanced with the risk of moisture-induced spoilage, which is why understanding the “water activity” ($a_w$) of the cake is vital for shelf-stable versions.
Ingredients and Quality Considerations
The success of a Cake in a Jar Recipe depends on the structural integrity of the ingredients. Because the cake is viewed through glass, the uniformity of the crumb is as important as the flavor.
- Flour: A high-quality cake flour with a lower protein content (approx. 7–9%) is recommended. This ensures a fine, tender crumb that looks delicate and professional through the jar walls.
- Fats: Butter provides the best flavor, but oil-based cakes (like carrot or chocolate) often perform better in jars. Oil remains liquid at room temperature, ensuring the cake feels moist even after the jar has been sealed and stored.
- Leavening Agents: Precision in measuring baking powder and baking soda is critical. Excessive leavening will cause the batter to overflow the jars, ruining the aesthetic and the seal.
- Inclusions: If adding chocolate chips or fruit, they must be tossed in a light coating of flour. This prevents them from sinking to the bottom of the jar, which is highly visible and undesirable in a Cake in a Jar Recipe.
Equipment and Setup
The equipment used for a Cake in a Jar Recipe must be selected based on its ability to withstand thermal shock and its suitability for canning processes.
- Canning Jars: Only use wide-mouth, straight-sided jars (such as Mason, Ball, or Kerr). Avoid jars with “shoulders” or narrow necks, as the cake will be impossible to remove or frost effectively. Ensure the jars are “tempered” glass, rated for oven use.
- Baking Sheet: Jars should be placed on a heavy-duty baking sheet. This provides stability and makes it easier to move multiple jars in and out of the oven simultaneously.
- Digital Scale: To ensure consistency across 12 or 24 jars, every jar must contain the exact same weight of batter. Bold Tip: Use a digital scale to weigh the batter into each jar; usually, filling the jar to exactly 50% capacity is the standard for a perfectly risen cake.
- Sterilization Equipment: If you intend to seal the jars for short-term storage, the lids and jars must be sterilized in boiling water or a high-heat dishwasher cycle before the batter is added.
Safe Temperature and Time Standards
Safety is the most critical component of the Cake in a Jar Recipe, particularly regarding the risk of Clostridium botulinum and mold growth in sealed environments.
- Oven Temperature: Set the oven to 325°F (163°C). The lower temperature accounts for the insulating properties of the glass and prevents the outside from browning too quickly.
- Internal Temperature: The cake is technically done when a probe thermometer inserted into the center reads 210°F (99°C).
- The Danger Zone: Sealed cakes in jars create an anaerobic (oxygen-free) environment. If the cake has a high moisture content or contains low-acid ingredients like fresh fruit, it must be refrigerated.
- Storage Limits: Unless you are using a professional retort or high-sugar/low-moisture commercial formula, home-baked jar cakes should be consumed within 3–5 days if stored at room temperature, or 2 weeks if refrigerated.
Cake in a Jar Recipe: Complete Method
1. Jar Preparation
Wash and dry your wide-mouth jars thoroughly. Coat the inside of each jar with a light layer of non-stick baking spray or melted shortening and a dusting of flour. This ensures the cake does not stick to the glass.
2. Batter Preparation
Prepare your chosen batter (Vanilla, Chocolate, or Red Velvet). Ensure all ingredients are at room temperature to facilitate a smooth emulsion. Bold Tip: Sift the dry ingredients twice to ensure there are no lumps, as these will be clearly visible through the glass after baking.
3. Precision Filling
Place a jar on the digital scale and tare it. Spoon or pipe in the batter until the jar is half full (approximately 150–200g depending on jar size). Wipe any stray drops of batter from the rim of the jar; a clean rim is essential for a proper seal.
4. The Baking Cycle
Arrange the jars on a baking sheet, ensuring they do not touch each other to allow for proper airflow. Bake at 325°F for 30–40 minutes.
5. Testing and Sealing
Insert a thin skewer into the center of a jar. If it comes out clean, the cakes are done. If you are sealing them, remove the jars from the oven one by one. Place a sterilized lid and ring on the jar immediately and tighten. As the cake cools, the lid should “pop,” indicating a vacuum seal.
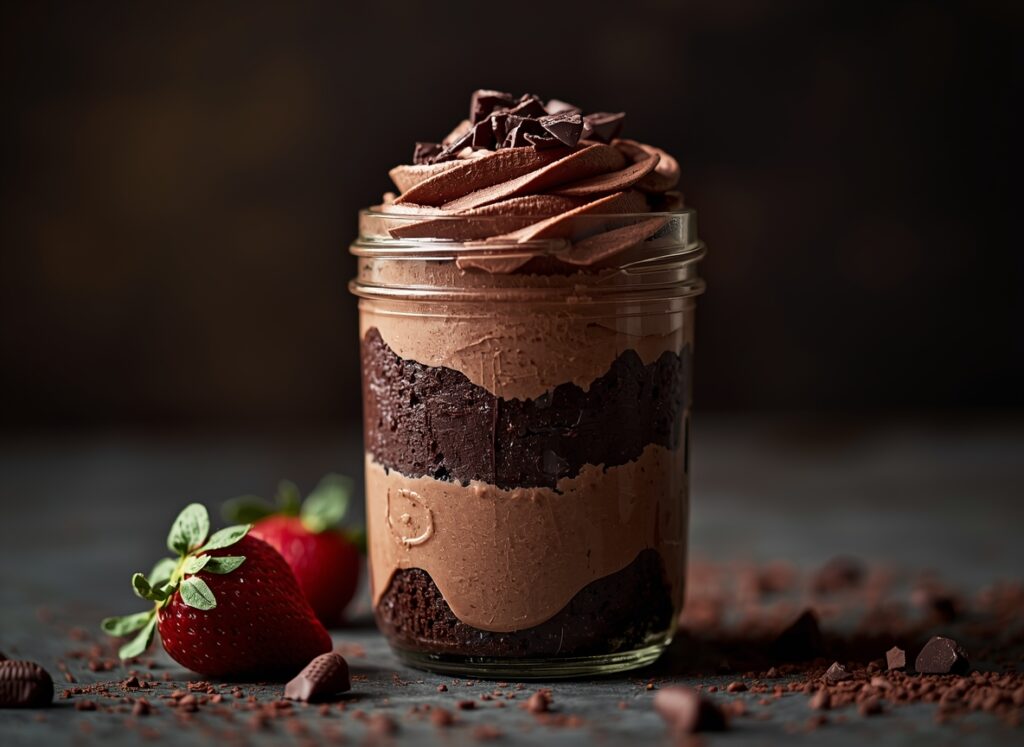
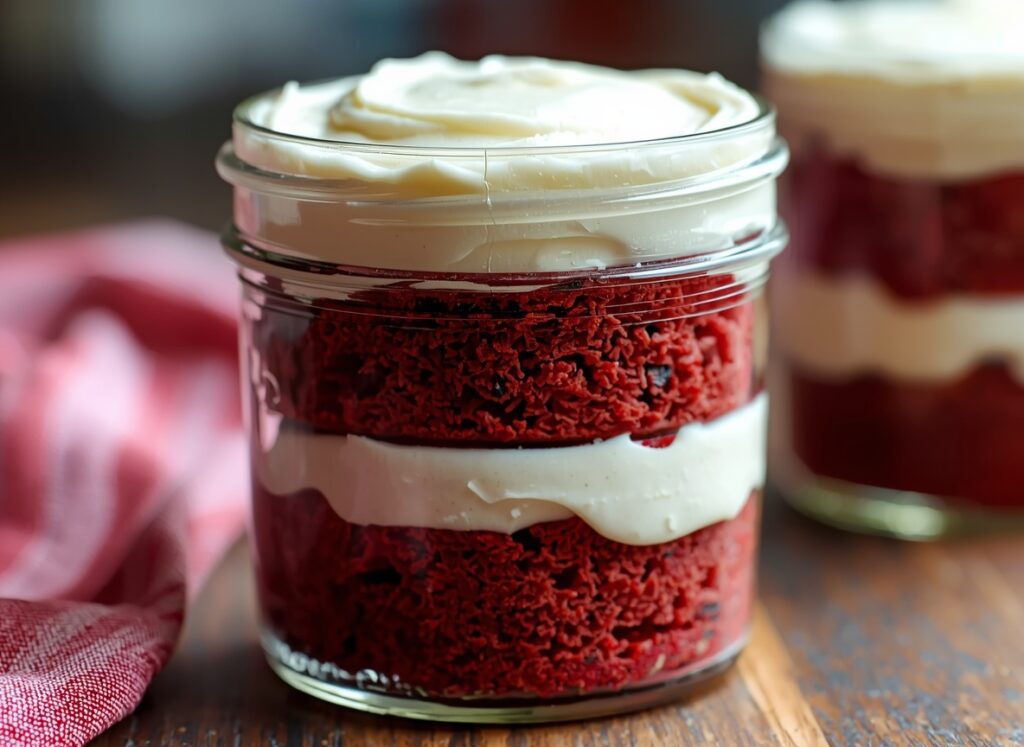
6. Cooling and Decorating
If not sealing, allow the jars to cool completely on a wire rack. Once cool, you can pipe frosting onto the top or add layers of ganache and sprinkles before capping the jars for transport.
Technical Problems and Solutions
Executing a Cake in a Jar Recipe can present specific challenges related to the geometry of the container.
- Problem: The cake overflowed the jar.
- Cause: Too much batter or too much leavening agent.
- Solution: Reduce the fill level to 45% or verify the accuracy of your baking powder measurements using a digital scale.
- Problem: The cake is dry and pulled away from the sides.
- Cause: Overbaking or high oven temperature.
- Solution: Lower the oven temperature by 15 degrees and use an internal probe thermometer to stop the bake at 210°F.
- Problem: Condensation inside the jar.
- Cause: Capping the jar while the cake was warm but not hot enough to create a vacuum, or storing a warm jar in the refrigerator.
- Solution: Either seal immediately while the cake is at “out-of-oven” temperatures or wait until the cake is 100% cooled before capping.
- Problem: The center is raw while the edges are dark.
- Cause: Thermal lag in the glass.
- Solution: Place a pan of water on the bottom rack of the oven to create a moist environment, which helps heat penetrate the center of the jars more evenly without drying the edges.
Frequently Asked Questions on Cake in a Jar Recipe
Is it safe to store these cakes at room temperature for months?
No. While the vacuum seal prevents mold for a short time, the moisture level in a standard Cake in a Jar Recipe is too high to prevent the growth of anaerobic bacteria like botulism at room temperature. For safety, treat these as fresh baked goods and consume them quickly or refrigerate.
Can I use any cake recipe for this?
Most recipes work, but those with high fat content (oil or butter) and a tighter crumb (like pound cake or mud cake) tend to look better and stay fresher in the jar environment than very airy sponge cakes.
How do I eat the cake out of the jar?
If using a wide-mouth jar, you can eat it directly with a long-handled spoon. If you greased the jar well, you can also run a thin knife around the edge and slide the cake out onto a plate for a cylindrical presentation.
Can I bake the frosting in the jar too?
No. Frosting contains high amounts of sugar and fat that will melt or break down under oven temperatures. Always add frosting after the cake has cooled.
What size jars are best for a Cake in a Jar Recipe?
The 8-ounce (half-pint) wide-mouth jar is the industry standard for a single serving. It provides the best ratio of surface area to depth for even baking.
Can I reuse the lids?
While you can reuse the rings, you should use new lids for every bake if you are looking for a vacuum seal. The sealing compound on the lids is designed for a single use.
Easy Mandarin Orange Cake Recipe for a Perfect Citrus Dessert
Homemade Chocolate Strawberry Cake Recipe – Perfect Dessert
Delicious Nothing Bundt Cake Recipe – Moist & Easy to Bake
The Best Pecan Pie Dump Cake Recipe You’ll Ever Try