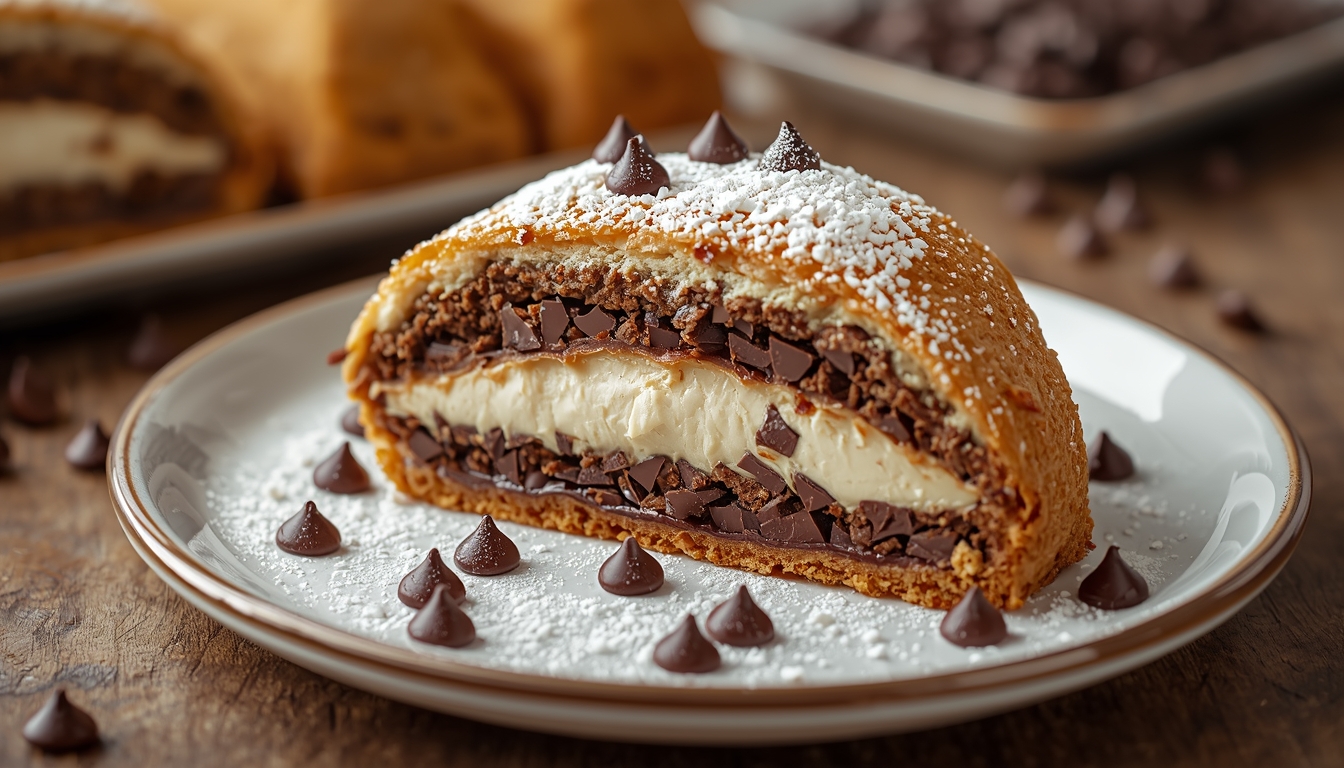
Earthquake Cake Recipe Imagine pulling a pan from your oven. The top cracks like shifting earth. Inside waits a gooey, chocolatey surprise that sinks your fork right in. That’s earthquake cake. This dessert shakes up boring sweets with its wild layers and rich taste. It’s a hit at any gathering.
The Phenomenon Behind the Name
What Makes Earthquake Cake So Unique?
Earthquake cake gets its name from the way it bakes. The top layer splits open as the fillings sink down. This creates a cracked surface that looks like ground after a quake.
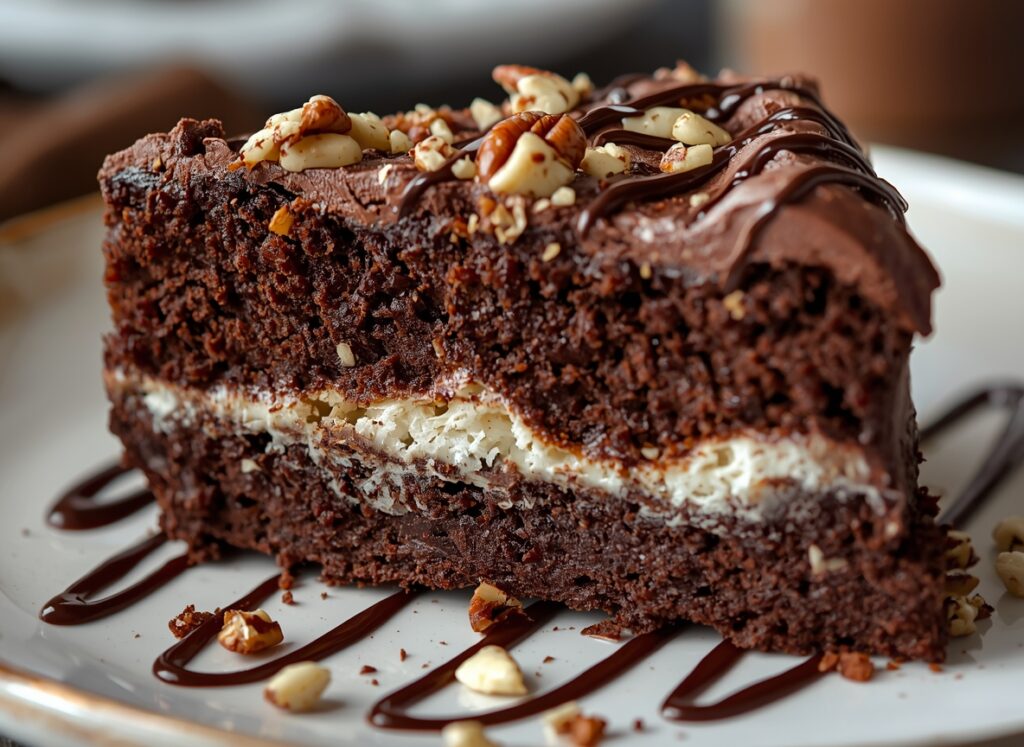
The mix of textures sets it apart. You get soft cake below, a creamy ooze in the middle, and crunchy bits on top. It’s gooey yet holds together just enough to slice.Earthquake Cake Recipe
No fancy skills needed for this unique cake. It’s an easy layered cake that delivers big on flavor. Think of it as a gooey dessert that wows without the work.Earthquake Cake Recipe
Why This Recipe Guarantees Success
This earthquake cake recipe stands out as foolproof. It balances sweet chocolate with rich cream for a moist result every time. Unlike basic versions, ours tweaks the layers for extra decadence.
Beginner bakers love it. The steps forgive small slips, like uneven pouring. You’ll end up with a sweet, moist cake that tastes pro-level.Earthquake Cake Recipe
Trust this guide. It cuts common pitfalls and amps up the indulgence. Get ready for compliments.
Section 1: Deconstructing the Decadence – Core Ingredients
Earthquake cake shines through smart picks. Each part builds the magic. Let’s break down what makes this moist cake texture secret work.
The Cake Base: Choosing the Right Mix
Start with a boxed cake mix for the base. Go for chocolate to boost the rich vibe, or yellow for a milder twist. These mixes keep things simple and lock in moisture.
Oil works best over butter here. It adds tenderness without greasiness. If you bake from scratch, swap in 1 cup water, 1/2 cup oil, and 3 eggs.
High-quality brands like Duncan Hines yield the best chocolate cake ingredients. They rise even and stay soft. This foundation supports all the sinking layers.
The Creamy Center: Sweetened Condensed Milk Magic
Sweetened condensed milk is the star of the show. It pours thick and sweet, turning into a fudgy core as it bakes. This creates the signature ooze that defines earthquake cake.
Skip it, and you lose the glue. It binds flavors and adds that pull-apart chew. One 14-ounce can does the trick for a 9×13 pan.
Heat helps it melt just right. Drizzle it slow to soak the base evenly. That’s how you get moist cake texture that lasts.
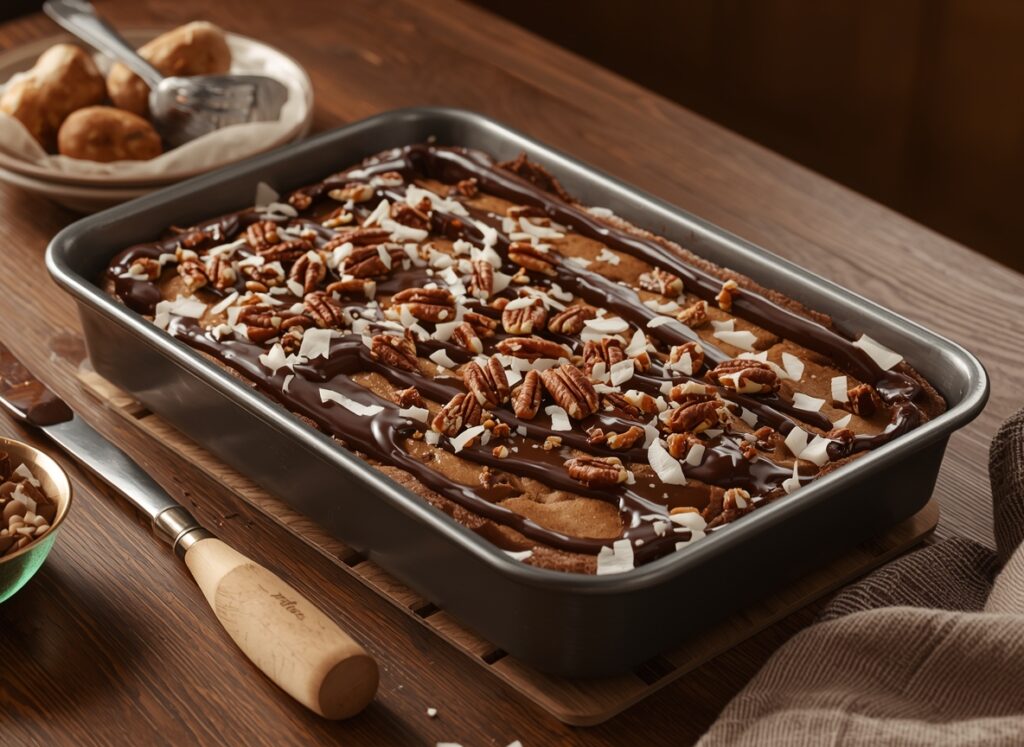
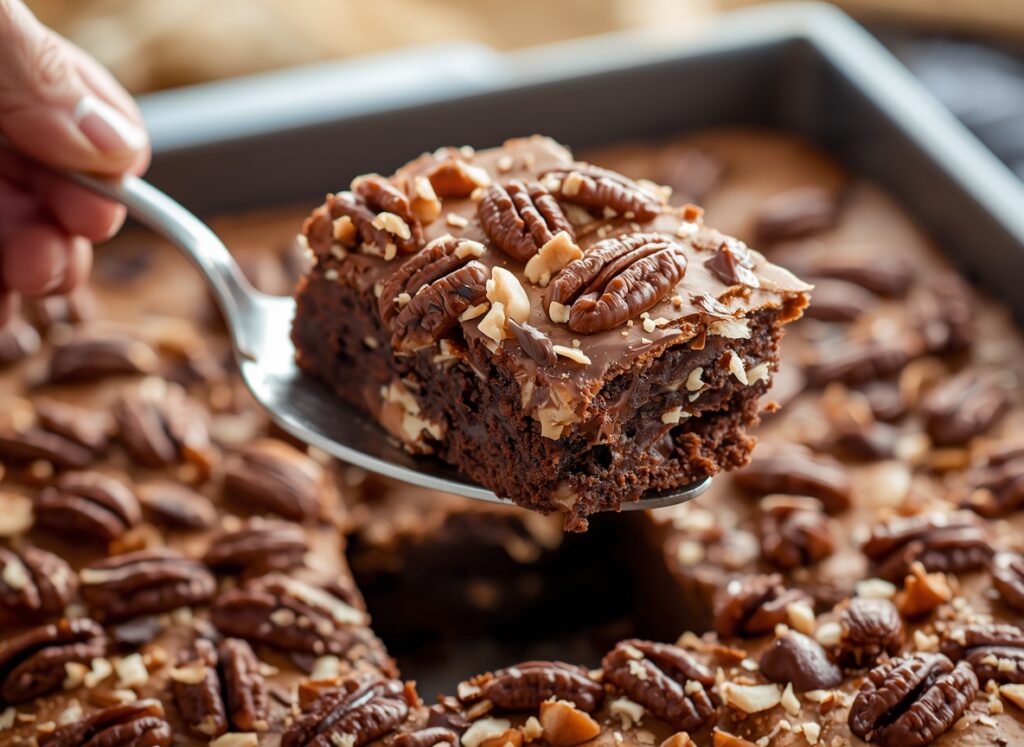
The Crunchy Topping: Nuts and Sweet Additions
Nuts bring the crunch to balance the soft spots. Pecans offer a buttery note; walnuts add earthiness. Toast them lightly in a dry pan for five minutes to wake up their taste.
Sprinkle about a cup on top before baking. They sink a bit but stay crisp. For fun, toss in toffee bits or more chocolate chips.
These best chocolate cake ingredients elevate the whole thing. They contrast the gooey dessert layers perfectly. Keep portions modest to avoid overload.Earthquake Cake Recipe
Step-by-Step Baking Mastery
Baking earthquake cake feels like an adventure. Layers build one by one. Follow these steps for a decadent dessert that impresses.
Preparing the Pan and Dry Layers
Grab a 9×13-inch pan. Grease it well with butter or spray. Dust with flour to prevent sticking. This setup ensures easy release later.
Sprinkle the dry cake mix evenly over the bottom. No need to stir or mix yet. Add coconut flakes if you like a tropical hint—about 1 cup works.
For from-scratch fans, whisk dry ingredients first. But keep it light. Overmixing toughens the base, so just combine gently.
Layering the Gooey Fillings
Now comes the fun part. Scatter 1 cup chocolate chips across the dry layer. They melt into pockets of bliss.
Mix one can sweetened condensed milk with 1/2 cup melted butter. Pour this slow over everything. Watch it seep in for distinct layers.
Top with those toasted nuts and extras. The order matters—driest on bottom, wettest on top. This lets gravity do its work during bake time.Earthquake Cake Recipe
Baking Time and Temperature Optimization
Preheat your oven to 350°F. Slide the pan in the middle rack. Bake for 35 to 45 minutes.
Check at 35 minutes. The edges should pull away, and the center looks set but jiggles a touch. That’s your cue—pull it out.
Sugar in the fillings melts around 320°F, per baking basics. This heat sets the cake structure without drying it. Cover with foil if the top browns too fast. Your sweet, moist result awaits.
Achieving the Perfect ‘Earthquake’ Effect
The quake happens in the oven. Ingredients shift and settle. Here’s how to nail that look and feel.
Understanding Ingredient Density and Settling
Denser parts like chocolate and milk sink through the lighter cake mix. Heat expands air pockets, then they collapse as it cools. This mimics dump cakes, where you just layer and bake.
Think of it like a casserole with sweets. The settling creates those cracked peaks and gooey valleys. No stirring needed—that’s the charm of this easy layered cake.
About 80% of bakers see the effect in under an hour. It’s science making your unique cake pop.
Cooling and Setting Protocols
Let the cake cool in the pan on a wire rack. Wait at least two hours, or overnight for best results. This firms up the layers without crumbling.
Cutting while warm leads to mush. The dairy needs time to set firm. Patience pays off in neat slices.
Don’t shake the pan post-oven. It disrupts the settling. Cover loosely if your kitchen’s drafty.
Troubleshooting Common Baking Issues
If the cake turns dry, you baked too long. Next time, tent foil at 30 minutes. Add an extra splash of milk to the mix for moisture.
Runny filling? Your condensed milk might be cold. Warm it slightly before pouring. It blends better then.
Burnt topping happens fast with nuts. Lower the temp to 325°F or watch closely. Quick fixes keep your gooey dessert perfect.Earthquake Cake Recipe
Frosting and Final Presentation
Finish strong with toppings. They seal the decadence. Turn your bake into a showstopper.
The Essential Chocolate Glaze or Frosting Companion
A simple glaze pairs best with this chocolate cake. Mix 1 cup powdered sugar, 2 tablespoons cocoa, 3 tablespoons milk, and 1 teaspoon vanilla. Whisk until smooth, then drizzle.
For creamier, whip up cream cheese frosting. Beat 8 ounces softened cream cheese, 1/4 cup butter, 2 cups powdered sugar, and vanilla. Spread thick for extra indulgence.
Dark chocolate ganache works too. Melt 8 ounces chocolate with 1 cup cream, then pour over cooled cake. These best frosting for chocolate cake options enhance the moist layers.Earthquake Cake Recipe
Garnishing for Maximum Visual Impact
Dust cocoa powder over the cracks for drama. It highlights the earthquake look. Sprinkle reserved nuts around the edges for crunch appeal.
Add fresh berries like raspberries. Their red pops against the brown. A few mint leaves freshen it up.
Keep it simple. The cake’s texture steals the show in this decadent dessert topping setup.
Serving Suggestions and Storage
Serve at room temp for best texture. Warm slices melt the chocolate just right, but cool holds the shape. Cut into squares for easy grabs.
Store in the fridge due to the milk. Cover tight; it lasts up to five days. For longer, freeze slices up to a month—thaw overnight.
This cake rules potlucks. One pan feeds 12 to 15 folks. Its crowd-pleasing ease makes it a family gathering staple.
Conclusion: Your New Go-To Decadent Dessert
Key Takeaways for Mastering Earthquake Cake
Layer in order: dry base, chips, then wet mix. Don’t overbake—aim for that soft center. Cool fully before cutting to lock in the gooey magic.Earthquake Cake Recipe
These steps guarantee the sweet, moist combo. The textures—crunchy top, fudgy middle, cakey bottom—make it irresistible.
Practice once, and you’ll own this recipe.Earthquake Cake Recipe
FAQ – Earthquake Cake Recipe
1. What is Earthquake Cake RECIPE?
Earthquake Cake is a rich, moist dessert made with layers of cake, coconut, nuts, and chocolate. The “earthquake” name comes from its gooey, textured top that looks delightfully messy.
2. Can I make Earthquake Cake ahead of time?
Yes! It actually tastes even better the next day after the flavors meld. Store covered at room temperature or in the fridge for up to 3–4 days.Earthquake Cake Recipe
3. Can I use different nuts or omit them?
Absolutely! Walnuts, pecans, or almonds all work. If you prefer nut-free, just skip them—the cake will still be delicious and gooey.
4. How do I keep the cake moist?
The combination of sweetened condensed milk, butter, and coconut creates a soft, gooey texture. Avoid overbaking, and check for doneness with a toothpick.
5. Can I make it gluten-free?
Yes! Substitute a 1:1 gluten-free flour blend for regular flour. Baking time may vary slightly, so keep an eye on the cake toward the end.Earthquake Cake Recipe
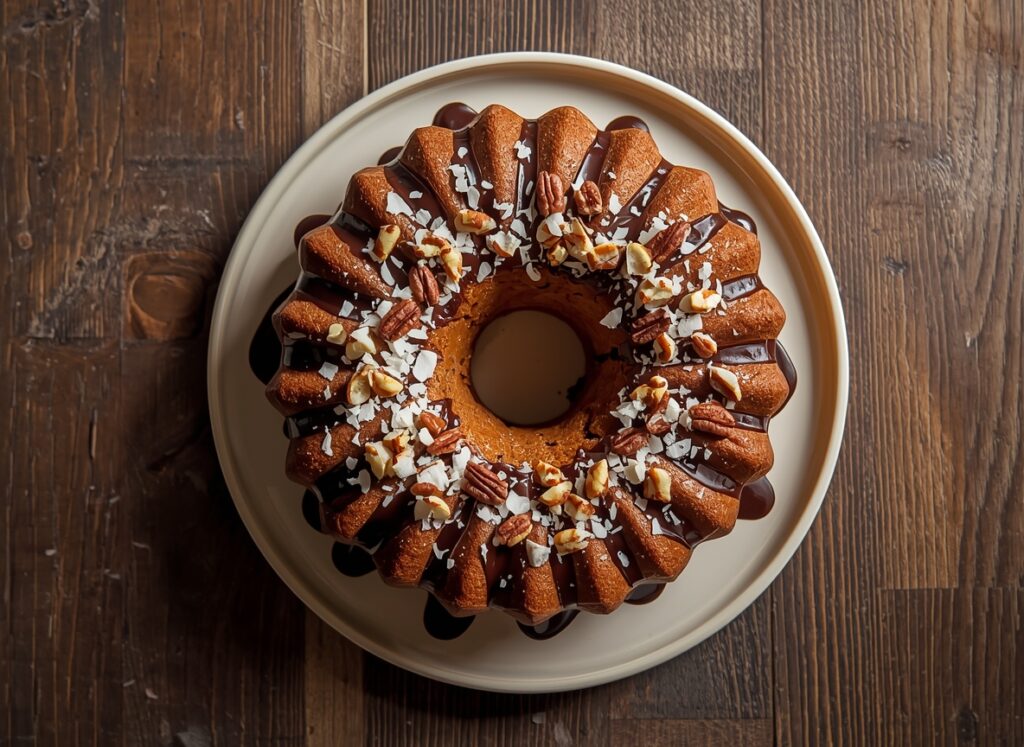
Pineapple Upside Down Cake Recipe – Classic, Moist & Easy
The Ultimate Snickerdoodle Cake Recipe: Soft, Spiced Perfection
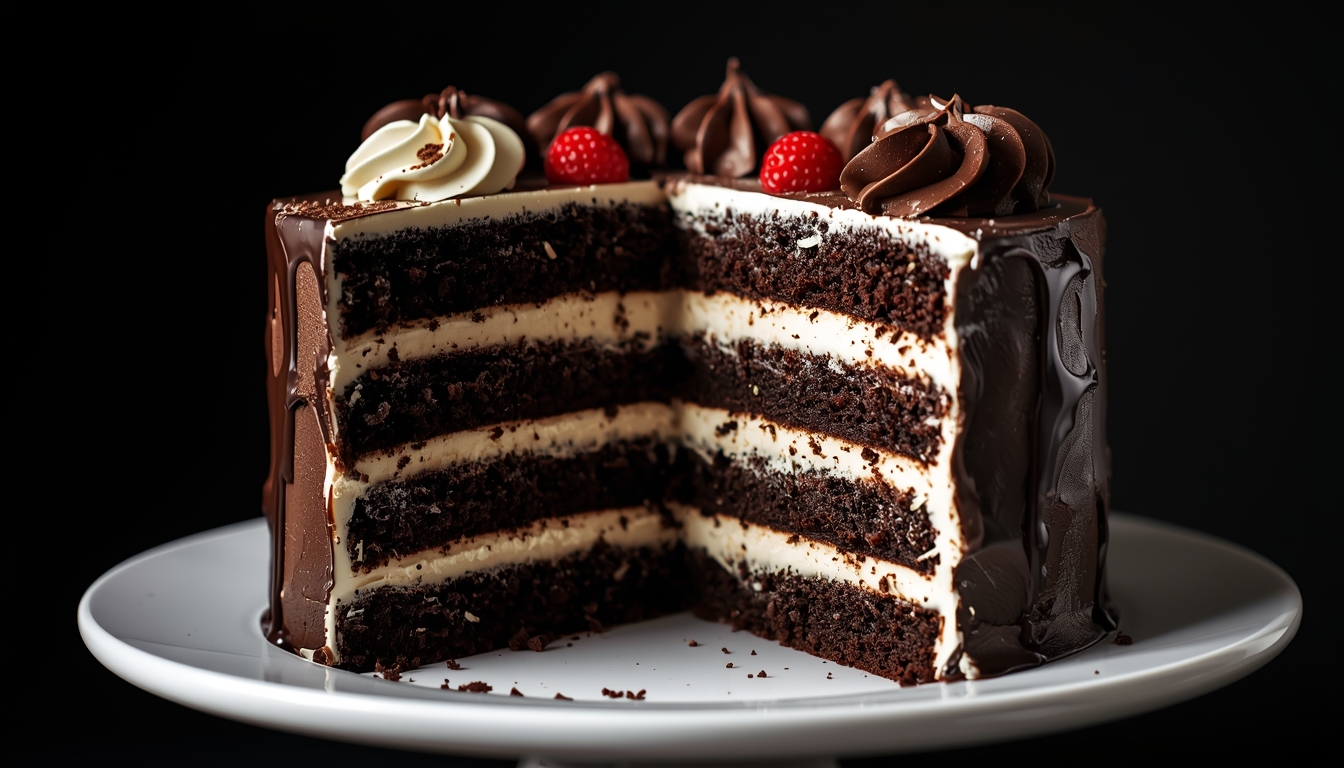
Homemade Chocolate Strawberry Cake Recipe – Perfect Dessert
Delicious Nothing Bundt Cake Recipe – Moist & Easy to Bake
Final Thoughts on Baking Comfort
Baking earthquake cake brings pure joy. Its bold flavors and fun bake reward every bite. Share it with friends; watch their faces light up.Earthquake Cake Recipe
You’ve got this. Whip up a batch soon. Your kitchen will smell like heaven, and your taste buds will thank you. Dive in and enjoy the shake. Earthquake Cake Recipe