In the world of professional baking, few things are more frustrating than a beautifully crafted cake sticking to the pan. While many home cooks rely on store-bought sprays or the traditional butter-and-flour dusting method, professionals often turn to a more reliable, cost-effective solution known as “Pan Release” or, more colloquially, the Cake Goop Recipe. This simple, three-ingredient mixture creates a powerful non-stick barrier that ensures even the most intricate bundt cakes or delicate sponges slide out of their molds with perfect edges.
The Cake Goop Recipe is essentially a homemade emulsion of fat and starch. Unlike commercial sprays, which can leave a sticky, gummy residue on your bakeware over time, this homemade version is clean, effective, and shelf-stable. By mastering this preparation, you can eliminate the anxiety of the “flip” and ensure that your cakes maintain their structural integrity from the oven to the cooling rack.
Why This Cake Goop Recipe Works
The efficacy of the Cake Goop Recipe lies in its chemical composition. To understand why it outperforms standard greasing methods, one must look at the roles of its three primary components: flour, vegetable oil, and vegetable shortening.
- The Barrier Effect: The shortening provides a thick, stable base that clings to the walls of the pan, even as it heats up in the oven. Unlike butter, which has a lower melting point and contains water, shortening is 100% fat and stays in place longer.
- Starch Suspension: The flour within the mixture acts as a microscopic “separator.” It prevents the batter from fully bonding with the metal of the pan. Because the flour is already suspended in fat, it doesn’t leave the white, dusty residue often seen when flouring a pan manually.
- Fluidity: The vegetable oil ensures the mixture remains spreadable at room temperature. This allows the goop to get into the tight crevices of ornate pans where a solid fat might clump.
By combining these three elements in equal measure, the Cake Goop Recipe creates a slick, heat-resistant film that expands slightly with the cake, providing a consistent release every time.
Ingredient Breakdown and Selection Tips
The beauty of the Cake Goop Recipe is its simplicity, but the quality of your ingredients will dictate the shelf life and performance of the final product.
1. All-Purpose Flour
Standard all-purpose flour is the ideal choice. There is no need for high-protein bread flour or low-protein cake flour here. The starch is what matters. Bold Tip: For chocolate cakes, you can substitute the white flour with unsweetened cocoa powder to ensure no light streaks appear on the dark exterior of your cake.
2. Vegetable Shortening
Select a shelf-stable, plain vegetable shortening. Avoid flavored versions (like butter-flavored shortening), as these often contain additives and water that can interfere with the non-stick properties. Shortening provides the “body” of the goop.
3. Neutral Vegetable Oil
Use a neutral-tasting oil with a high smoke point, such as canola, vegetable, or grapeseed oil. Avoid olive oil, which has a distinct flavor profile and a lower smoke point that may impart an unwanted taste to the crust of your cake.
Required Cooking Tools and Equipment
Preparing and applying the Cake Goop Recipe requires minimal equipment, most of which is likely already in your kitchen.
- Mixing Bowl: A medium-sized glass or stainless steel bowl is perfect for combining the ingredients.
- Electric Hand Mixer or Whisk: While you can mix this by hand, an electric mixer ensures a perfectly smooth emulsion without any lumps of shortening.
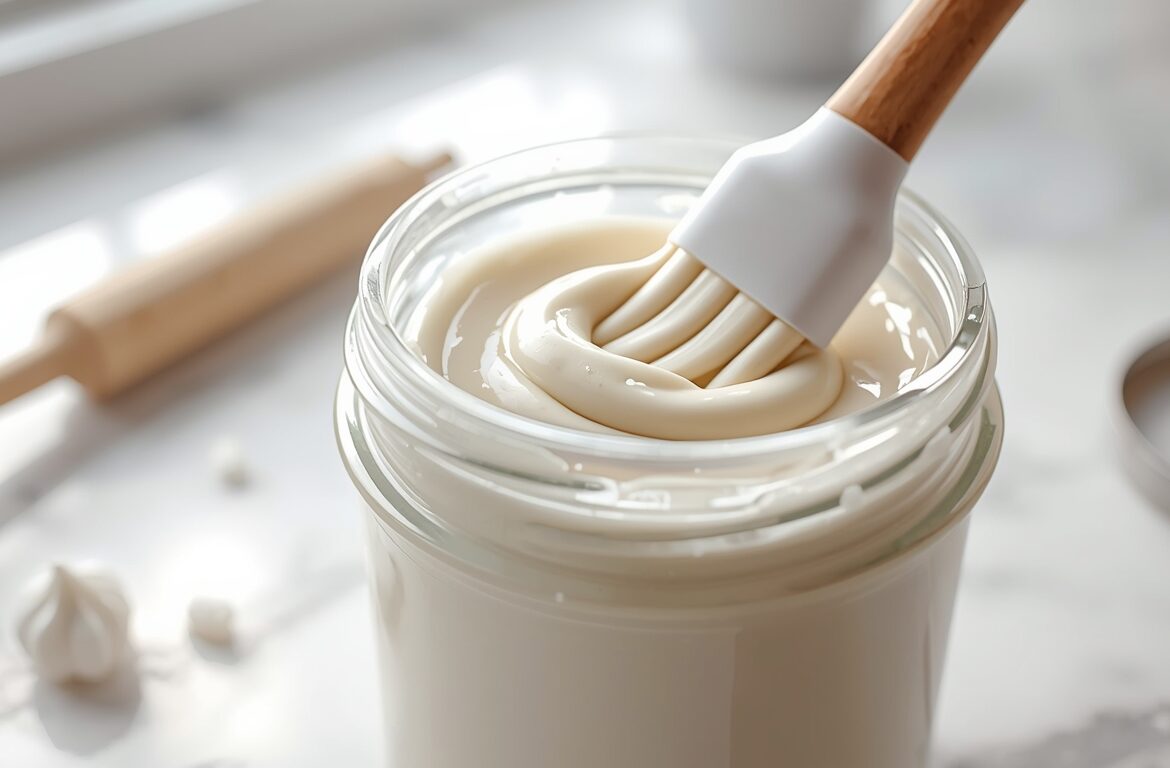
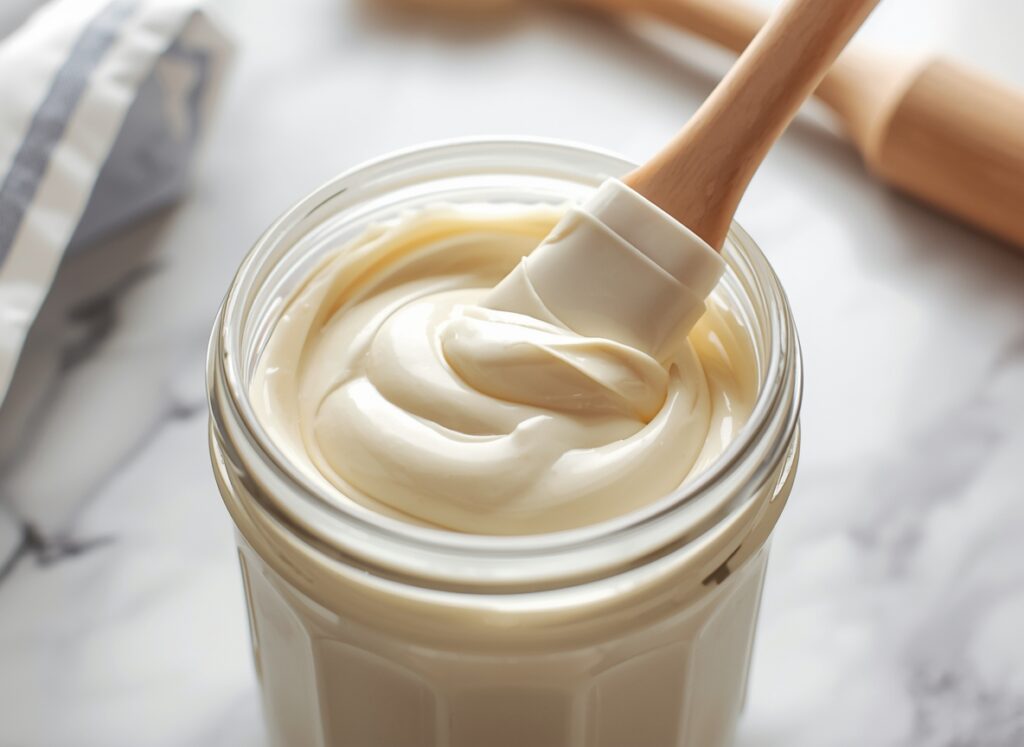
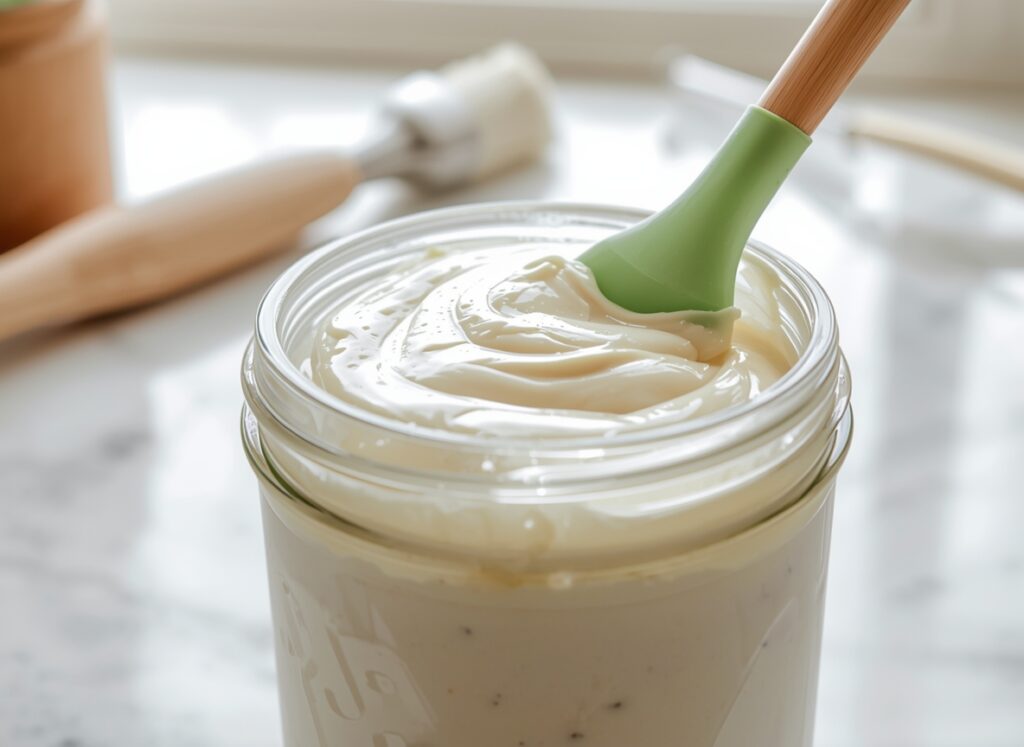
- Airtight Storage Container: A glass jar (like a mason jar) or a BPA-free plastic container is necessary. Since this recipe is shelf-stable, the container choice is vital for longevity.
- Pastry Brush: A high-quality silicone or natural bristle pastry brush is the best tool for applying the goop to your pans.
- Digital Kitchen Scale: For the best results, use a scale to ensure a 1:1:1 ratio by weight.
Cooking Timeline: From Prep to Finish
The Cake Goop Recipe is one of the most time-efficient preparations in a baker’s repertoire. Because it is made in bulk and stored for later use, the “per-use” time investment is negligible.
- Gathering Ingredients (2 Minutes): Measuring out equal parts of the three components.
- Mixing (3 Minutes): Beating the ingredients together until they reach a consistency similar to thick mayonnaise or marshmallow fluff.
- Storage (1 Minute): Transferring the mixture to a jar.
- Application (30 Seconds): Brushing the mixture onto your cake pans before baking.
In less than ten minutes, you can produce enough pan release to last through dozens of baking projects.
Detailed Cake Goop Recipe Instructions
1. Measurement by Weight
For the most reliable Cake Goop Recipe, use a 1:1:1 ratio by weight rather than volume. For a standard batch, measure 100 grams of all-purpose flour, 100 grams of vegetable shortening, and 100 grams of vegetable oil. If you do not have a scale, use 1 cup of each.
2. The Mixing Process
Place the shortening and the oil into your mixing bowl first. Use your mixer to cream them together until no large chunks of shortening remain. Gradually add the flour, starting the mixer on a low speed to avoid a flour cloud, then increasing to medium-high.
3. Achieving the Correct Consistency
Continue whisking or beating for about 2 minutes. The mixture should look white, creamy, and completely smooth. It should be thick enough to hold its shape but fluid enough to be easily spread with a brush.
4. Storage
Transfer the mixture into your airtight container. Store it in a cool, dark place, such as a pantry. Bold Tip: While it can be refrigerated, it is best kept at room temperature so it remains soft and ready to use at a moment’s notice.
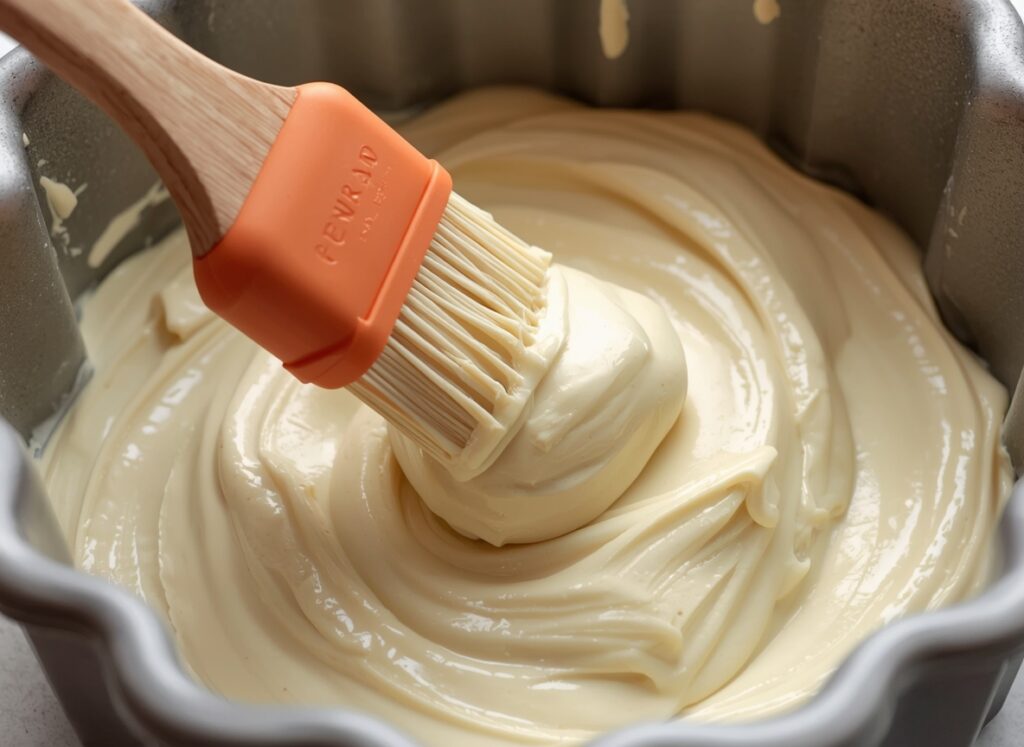
5. Proper Application
When you are ready to bake, dip your pastry brush into the goop. Apply a thin, even coat to the interior of your cake pan. Ensure you reach into the corners and up the sides. You do not need a thick layer; a translucent coating is sufficient to ensure a perfect release.
Common Problems and How to Avoid Them
While the Cake Goop Recipe is nearly foolproof, a few common errors can occur during preparation or storage.
- Lumpy Texture: This happens when the shortening is too cold or wasn’t beaten sufficiently. Ensure your shortening is at room temperature before mixing. If lumps persist, continue mixing until the emulsion is uniform.
- Separation Over Time: Since this is a suspension, some oil may eventually rise to the top if the jar sits for several weeks. This is normal. Simply stir the mixture with a spoon or a small whisk before use to reintegrate the oil.
- Off-Flavor or Rancidity: Because the mixture contains oil and shortening, it can eventually go rancid. Bold Tip: Smell the goop before use; if it has a sharp, paint-like, or “off” odor, discard it and make a fresh batch. Using fresh oil and shortening usually grants a shelf life of 3 to 6 months.
- Cake Still Sticking: This usually occurs if a spot was missed during application or if the cake has a very high sugar content (like a fruitcake), which can caramelize and stick despite the goop. For high-sugar recipes, you may still want to use a parchment paper circle at the bottom of the pan in addition to the goop.
Serving Options and Recipe Summary
The Cake Goop Recipe is a versatile tool that extends beyond standard cakes. It is equally effective for muffins, quick breads, and even savory dishes like Yorkshire puddings or baked mac and cheese where you want a clean release from the dish.
Summary Table
| Feature | Detail |
| Ingredients | Flour, Vegetable Oil, Vegetable Shortening |
| Ratio | 1:1:1 (By Weight or Volume) |
| Shelf Life | 3–6 Months (Pantry) |
| Best For | Bundt pans, Layer cakes, Muffins |
In summary, this preparation is a foundational skill for anyone serious about baking. It saves money compared to commercial aerosol sprays, protects your pans from chemical buildup, and provides the professional assurance that your hard work will not be ruined by a stubborn pan. By keeping a jar of this mixture in your pantry, you streamline your workflow and elevate the quality of your finished baked goods.
How to Make a Smash Cake recipe That’s Cute & Delicious
Quick & Simple Castella Cake Recipe – Perfect for Tea Time
Homemade Butterfinger Cake Recipe – Decadent & Simple
The Ultimate Dubai Chocolate Cake Recipe
Easy Italian Rum Cake Recipe – Perfect for Any Occasion